Our Cloud Implementation
This page will describe our Cloud implementation.
Website Implementation
Website Implementation
The AWS Management Console is a web application that
comprises and refers to a broad collection of service
consoles for managing Amazon Web Services. When you first
sign in, you see the console home page.

The home page provides access to each service console as well as an intuitive user interface for exploring AWS and getting helpful tips. Among other things, the individual service consoles offer tools for working with Amazon S3 buckets, launching and connecting to Amazon EC2 instances, setting Amazon CloudWatch alarms, and getting information about your account and about billing.

How to host a Website on AWS S3?
The following steps need to be followed if we wish to host a website on Amazon S3:
- Register a Domain
- Create and Configure Buckets and Upload Data
- Create and Configure Amazon Route 53 Hosted Zone
- Switch to Amazon Route 53 as Your DNS Provider
- Testing
You use Amazon S3 to create buckets, upload a sample website page, configure permissions so that everyone can see the content, and then configure the buckets for website hosting. You host content in the bucket.
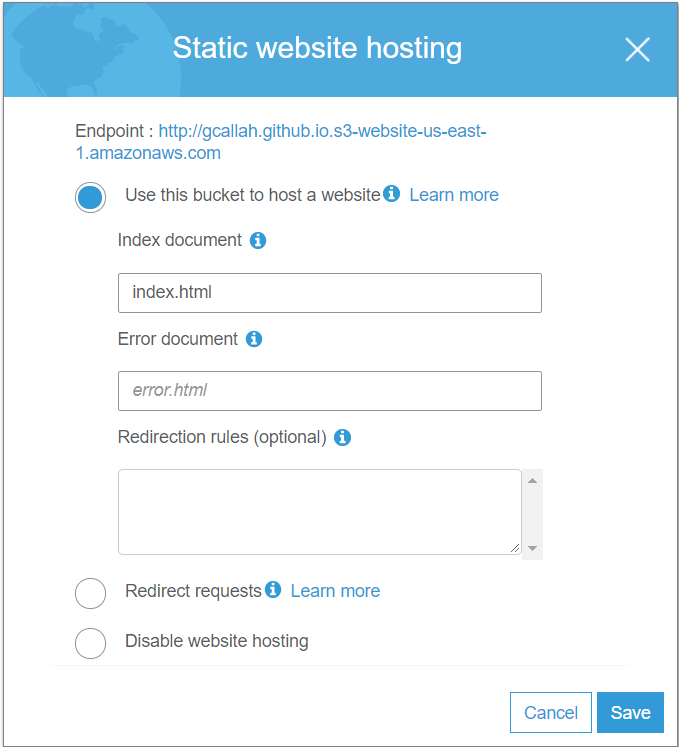
To configure your buckets for website hosting
- Sign in to the AWS Management Console and open the Amazon S3 console at https://console.aws.amazon.com/s3/
- In the Bucket name list, choose the name of the bucket that you want to enable static website hosting for
- Choose Properties
- Choose Static website hosting
- Configure the gcallah.github.io bucket for website hosting. In the Index Document box, type the name that you gave your index page
Now, since we have our domain name ready, let's continue with the further steps. We need to create the bucket. The bucket name must match with our website. In our case, to host gcallah.github.io on Amazon S3, we will name the bucket gcallah.github.io.
- So, sign in to the Amazon S3 console at https://console.aws.amazon.com/s3/ with your AWS account credentials and create the following bucket:
- Select the desired setting and complete the process

-
Once you have created the bucket, we configure it for website
hosting
- Now, from the Amazon S3 Console, select the bucket name that we want to enable static website hosting for
- Select Properties
- Select Static website hosting
- Configure the gcallah.github.io bucket for website hosting. In the Index Document box, type the name of the our index page
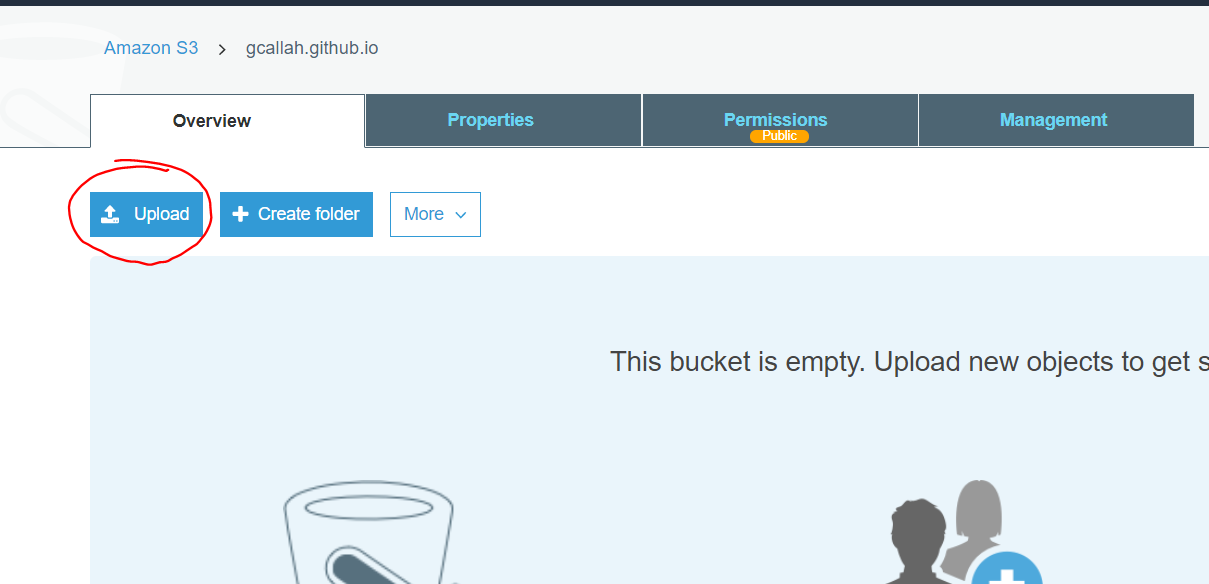
Once you do this and click on the endpoint url, it doesn't show you
our website. This is because we haven't uploaded anything into our
bucket yet.

Hence, we go to the bucket and upload our entire code there
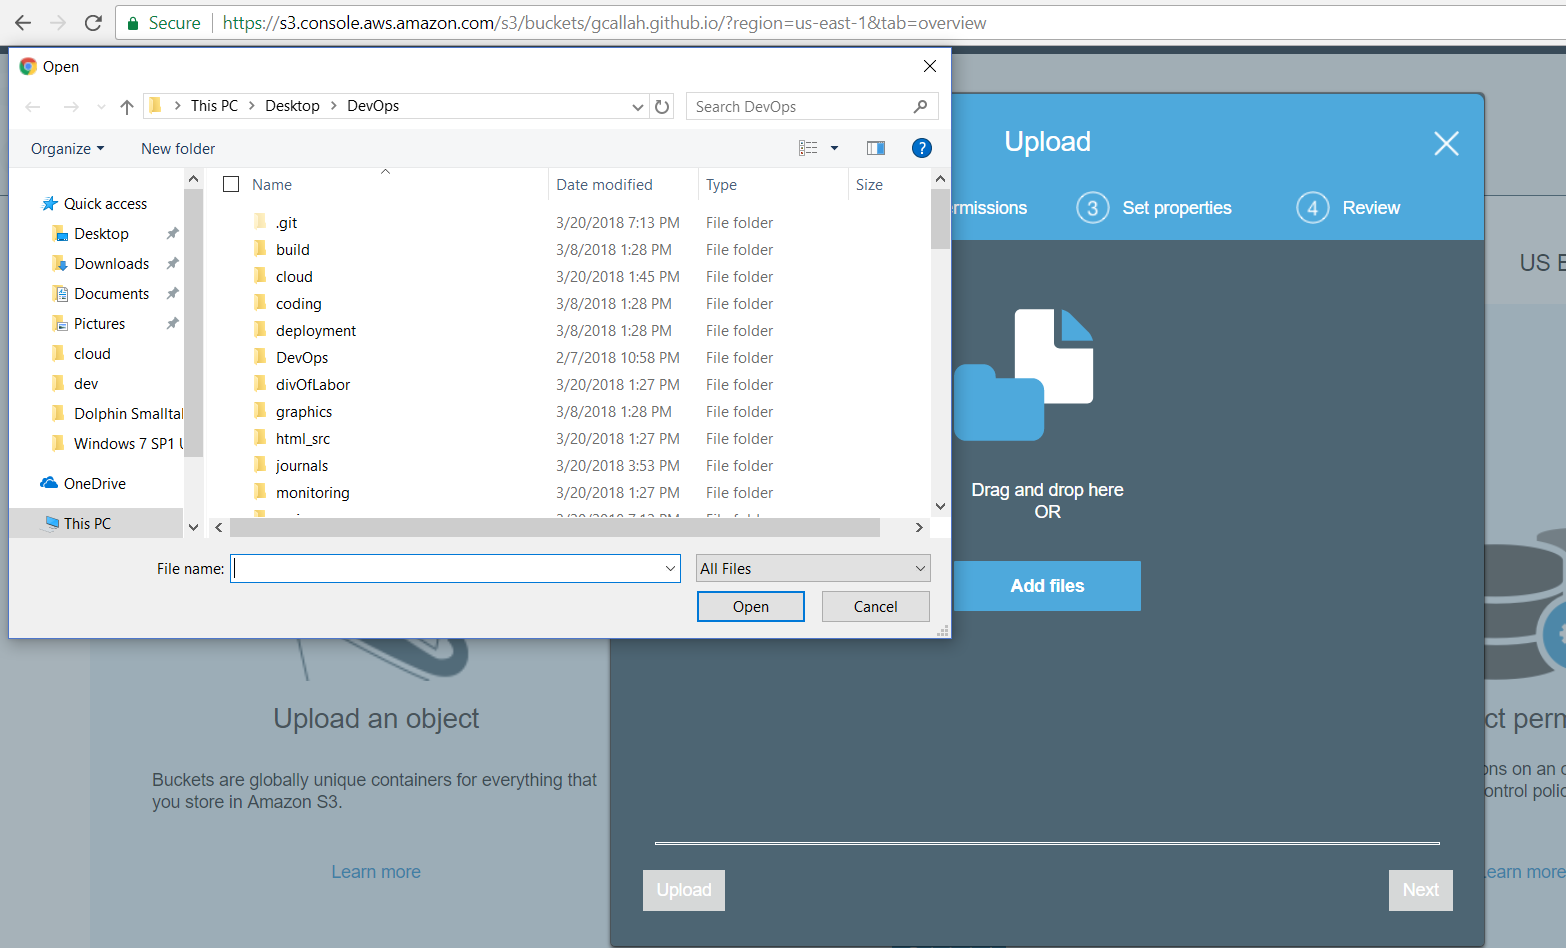
Once you have uploaded the code, hit the refresh button on the endpoint url. We still see that error 404. This is because our bucket is publicly inaccessible by default. We need to make them public. This can be done by two ways. First is either manually set the properties for each file uploaded. Second is by creating a privacy policy.
To create a privcy policy, go to the bucket.
Select permissions.
Enter the snippet into the editor and save it
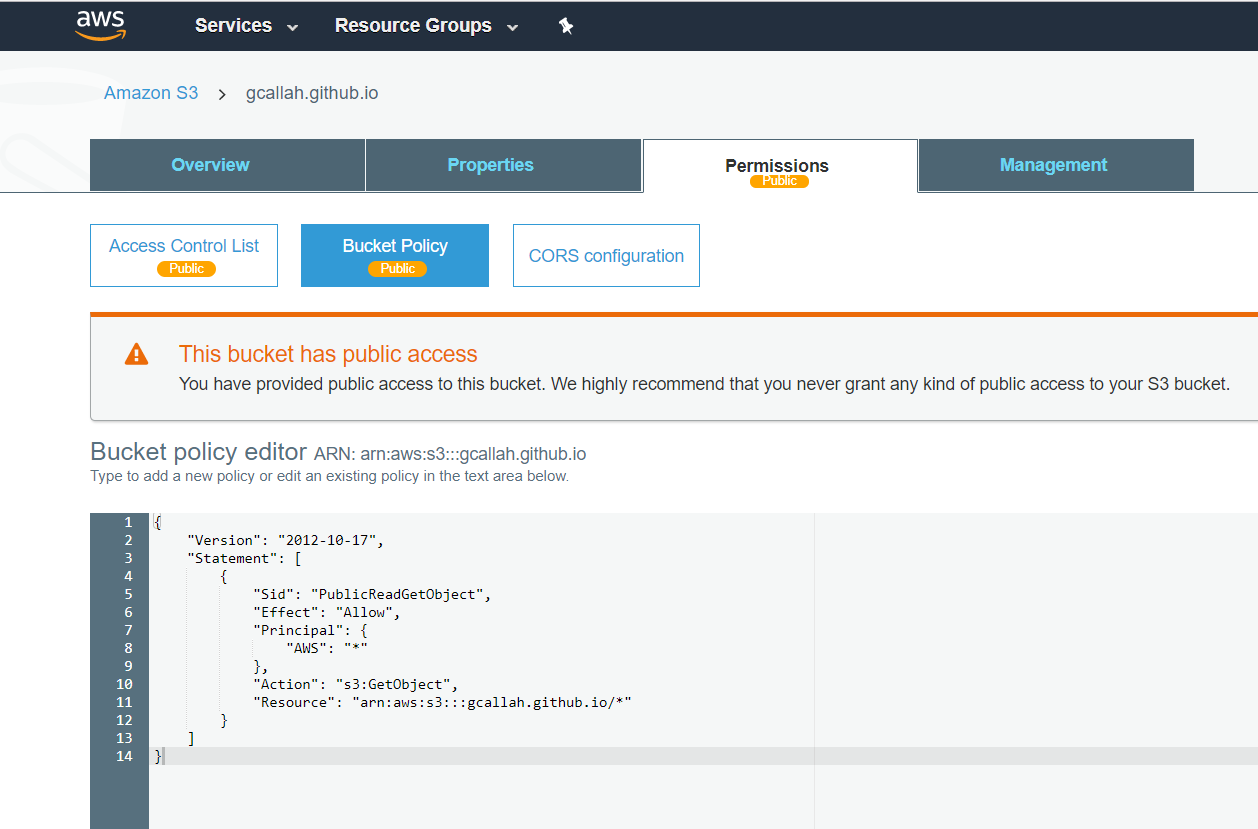
Once this policy is created, you'll be able to see the contents
of the webpage on hitting refresh.
Database Implementation
Database Implementation
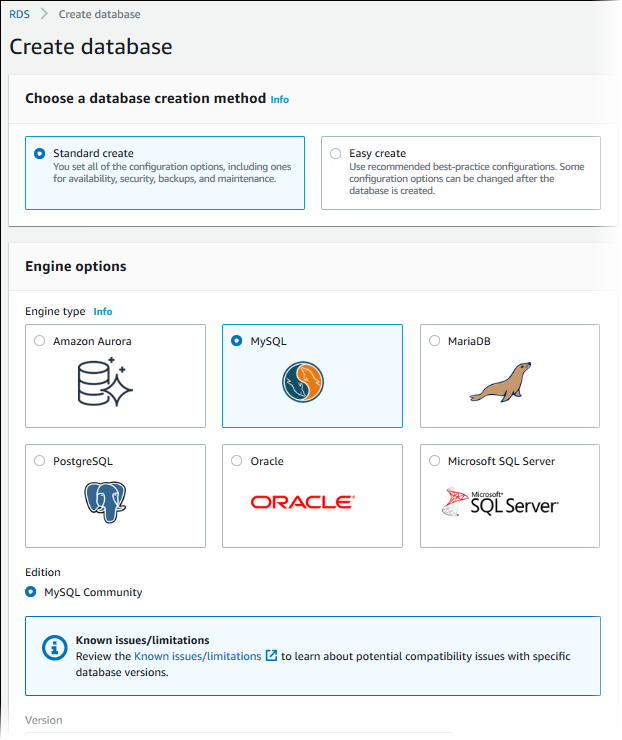
The AWS counterpart for relational database is AWS RDS(Relational
Database Schema). It supports several database engines. In our implementation
we will use MySQL because it is compatible with SQLite Database implemented by coding team.
Following steps are involved in our implementation.
- Download the original database from here.
- The obtained database is from sqlite. It is converted into MySQL type using free online tools such as this.
- Restore the obtained mysql database file in local MySQL Server.
- Create an AWS RDS MySql instance using the tutorial given here.
- Once instance is up and running, note down the instance endpoint url. This url will be used to access our AWS RDS database.
- Migrate the MySql database from local
MySQL Server to AWS RDS using the tutorial given here.
In our case the final command for migration using windows OS is
mysqldump -u adi ^ --databases db ^
--single-transaction ^ --compress ^ --order-by-primary  ^ -p temp | mysql -u
devops ^ --port=3306 ^ --host=db.c4x1mr3ptoih.us-east-1.rds.amazonaws.com ^ -p
nyu123456
. - Once the command is executed successfully. Check the database on AWS RDS instance. In our case the implemented AWS RDS url is "db.c4x1mr3ptoih.us-east-1.rds.amazonaws.com".