Our Deployment Implementation
Steps to deploy the website on Amazon EC2 instances using puppet
Configuration
We have used client/server architecture having one puppet master and one puppet agent.
Steps
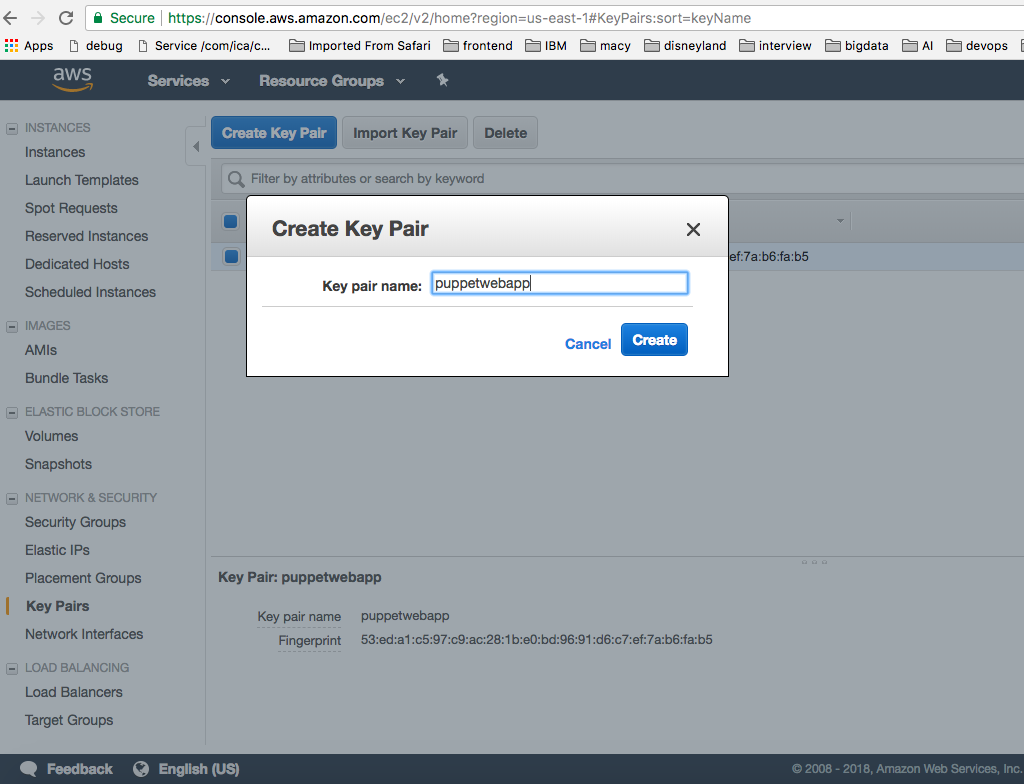
- KeyPair -
Login to Amazon AWS console. Go to Network and Security
and create key pairs to login into EC2 instances from
local machine.
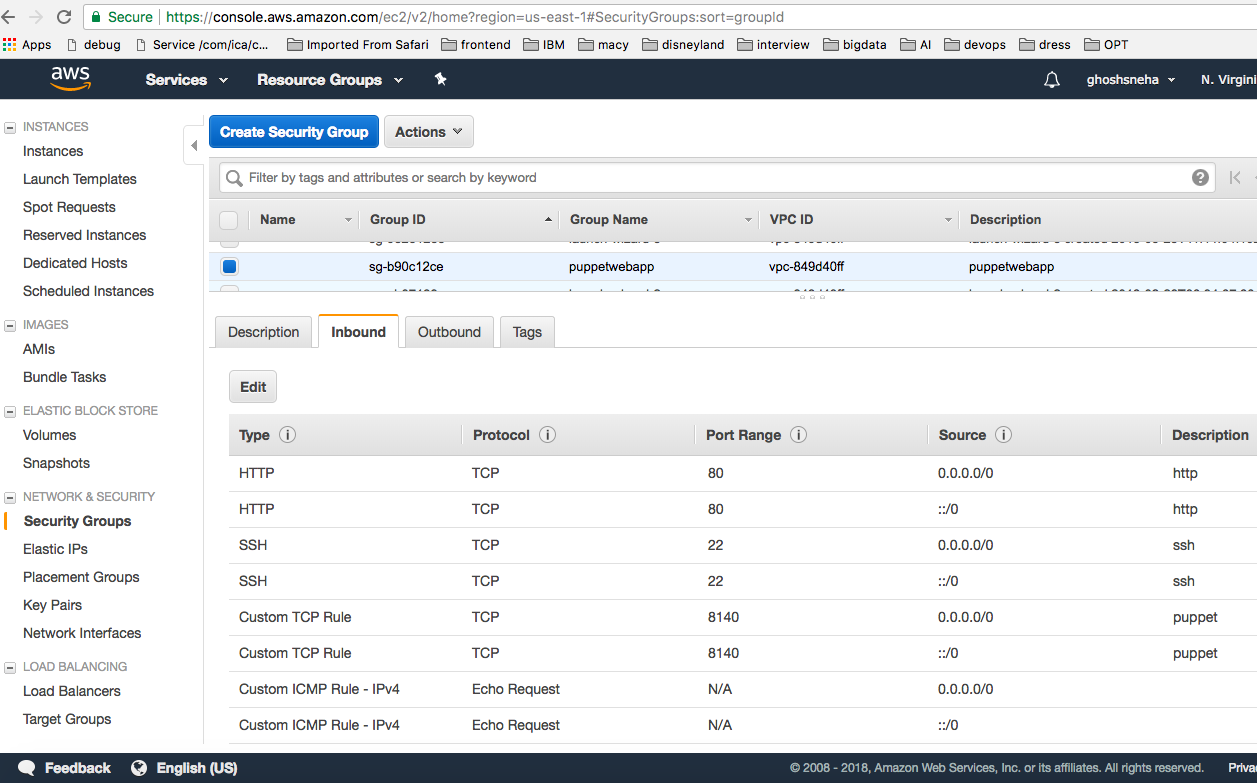
- Security Group -
Create Security Group to enable ports for http, ssh, tcp
and icmp. This group will be associated with the EC2
instances.
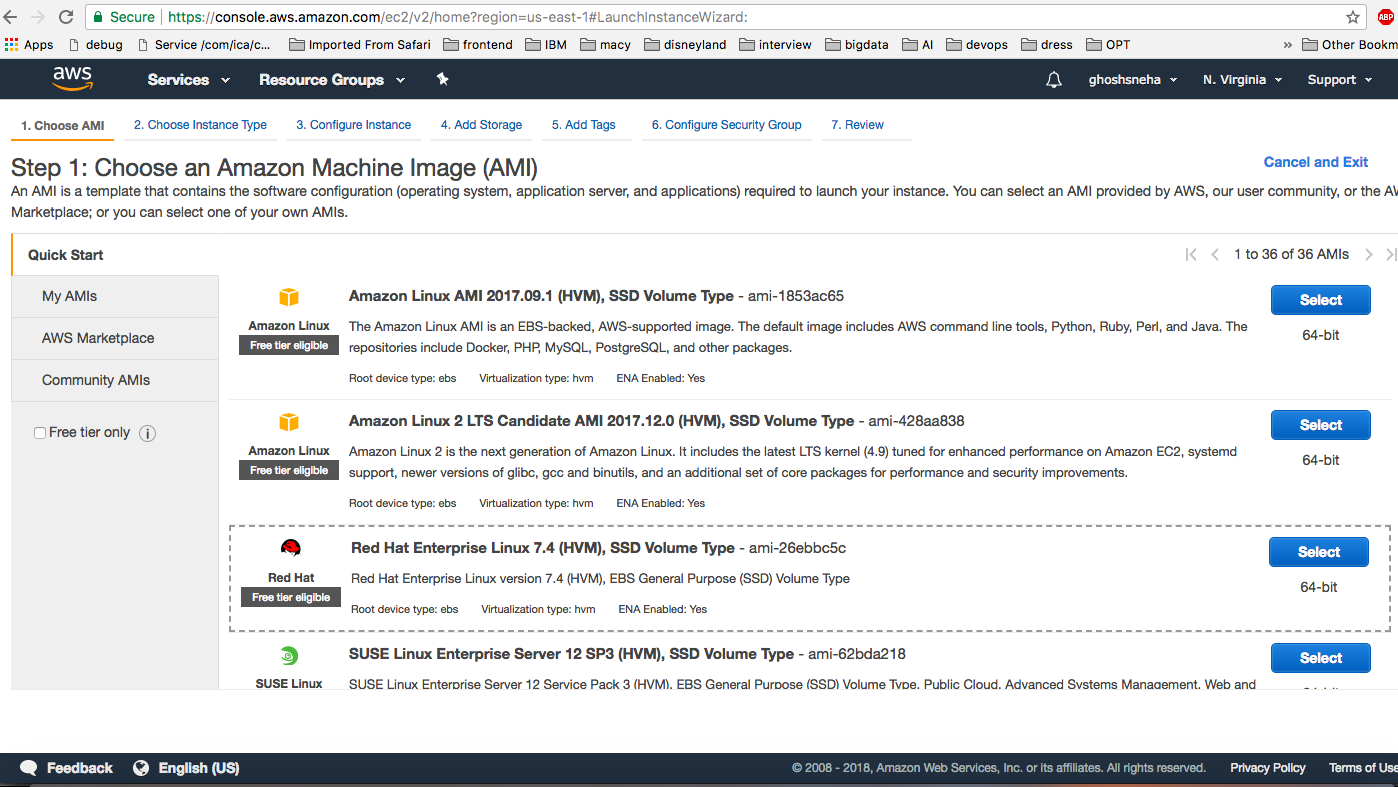
- Launch EC2 Instances -
Go to Instances and click on "Launch Instance". On the
next screen select "Red Hat Enterprise Linux" image.
Click "Configure Instance Details" and choose number of instances 2 (master and agent).
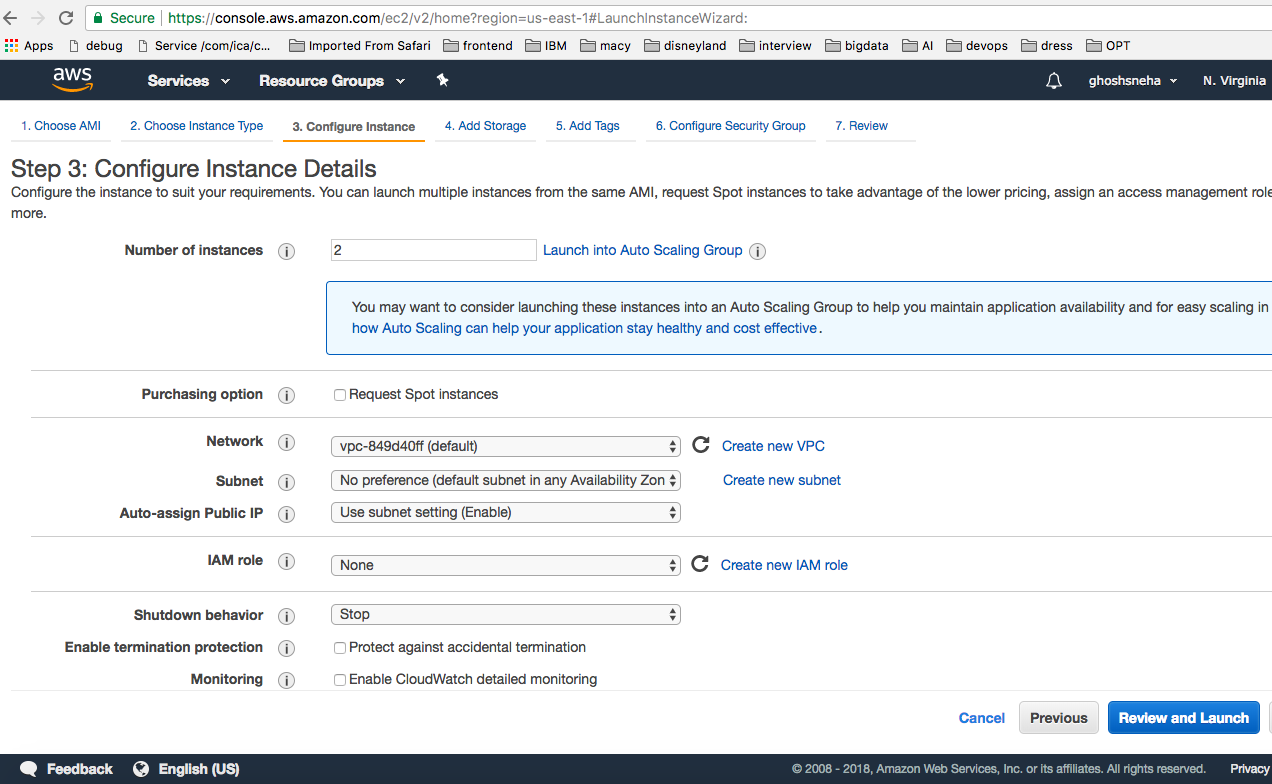
Go to next and on Step 6: "Configure Security Group" select the security group created before and then launch the instances.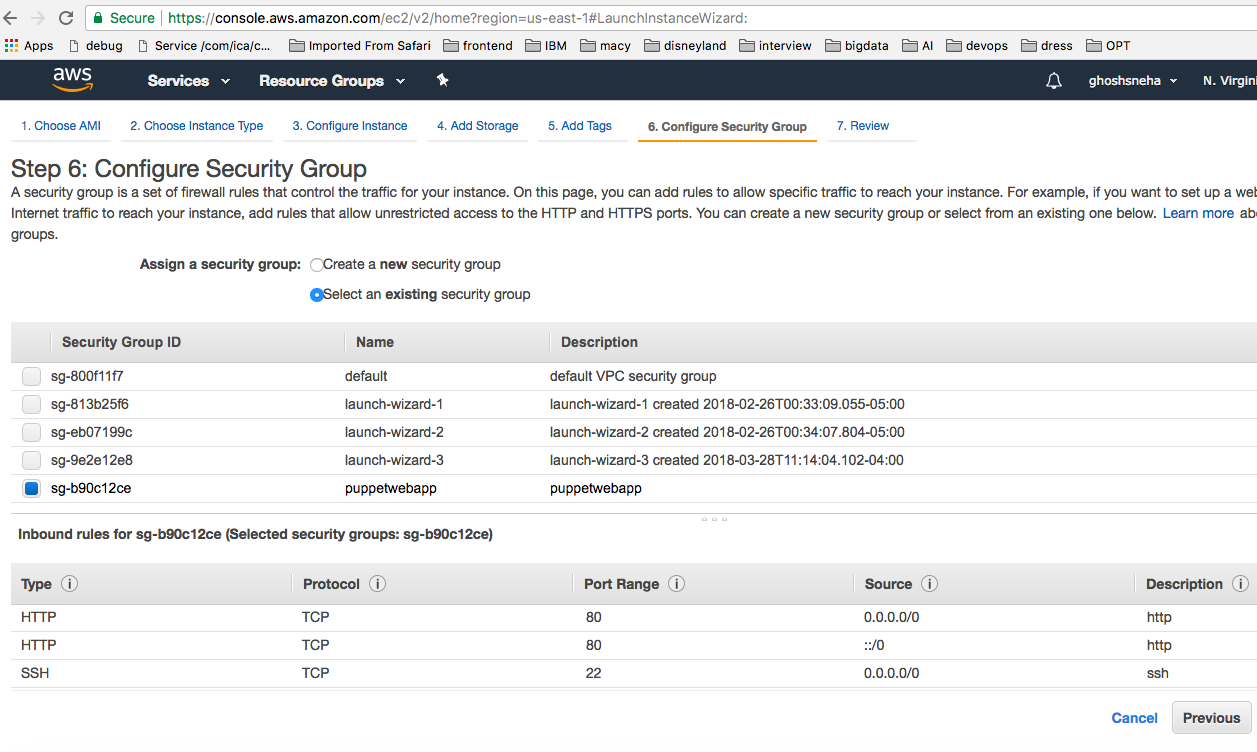
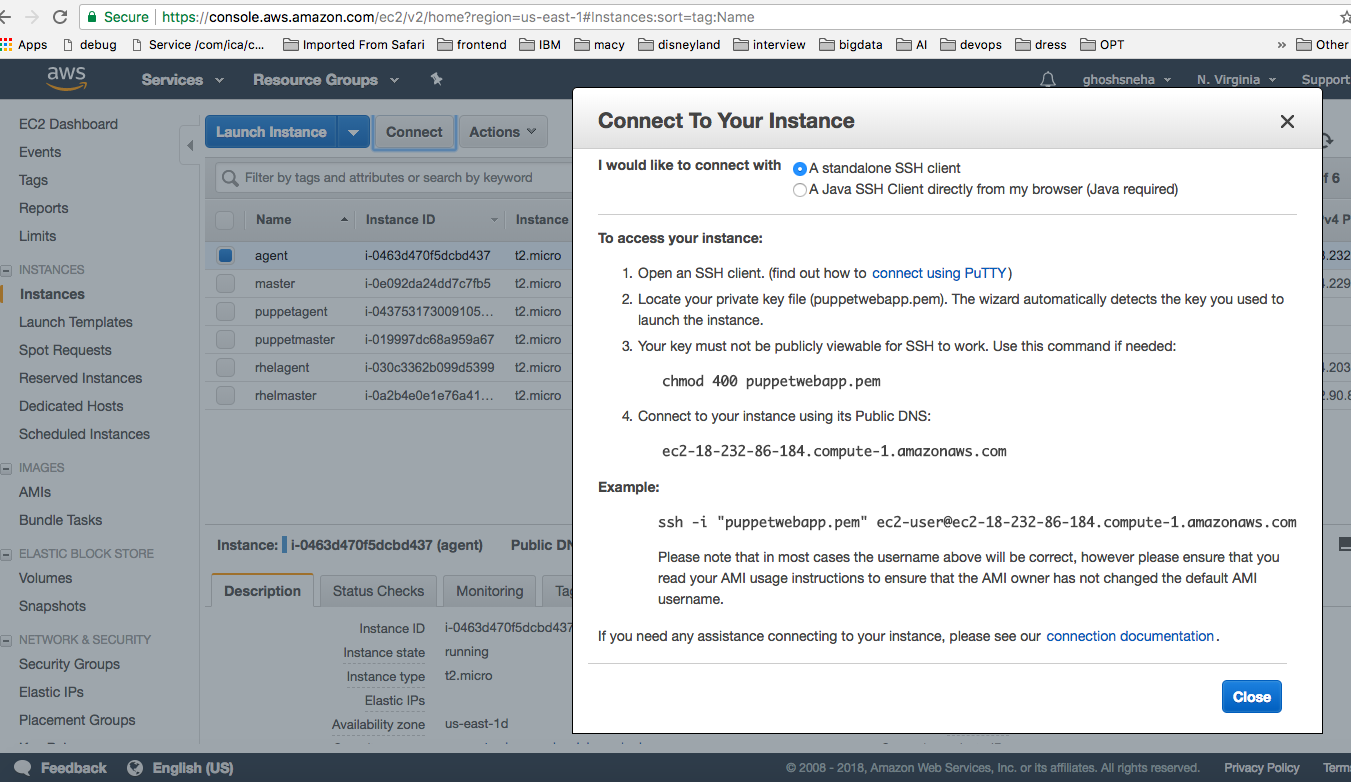
- Wait for the instance state change to running. Give names to instances (master, agent).
-
Next connect to the instances using ssh following the steps
in connect box as shown below
The puppet setup guide[2] was referenced for installing puppet on RHEL master and agent. The steps are described below:
Master Configuration
- Configure hostname for master node as:
[root@master ~]# hostname master.devops.org - Add entry for agent in hosts file of master:
[root@master ~]# vi /etc/hosts
ip-address-agent agent.devops.org agent - Puppet can be installed from the yum.puppetlabs.com
package repository using below command:
[root@master ~]# yum -y install https://yum.puppetlabs.com/ puppetlabs-release-pc1-el-7.noarch.rpm - Install puppet master server:
[root@master ~]# yum -y install puppetserver - Creating symbolic link to make puppet available on
command line:
[root@master ~]# ln -s /opt/puppetlabs/bin/puppet* /usr/local/bin/ - Generate CA certificate and the puppet master
certificate with the appropriate DNS names:
[root@master ~]# puppet master --no-daemonize --verbose - Enable and start puppetservice on master:
[root@master ~]# systemctl enable puppetserver
[root@master ~]# systemctl start puppetserver
Agent Configuration
- Configure hostname for agent node as:
[root@agent ~]# hostname agent.devops.org - Add entry for master in hosts file of agent:
[root@agent ~]# vi /etc/hosts ip-address-master master.devops.org master - Install puppet on agent:
[root@agent~]# yum -y install https://yum.puppetlabs.com/ puppetlabs-release-pc1-el-7.noarch.rpm
[root@agent ~]# yum -y install puppet-agent - Creating symbolic link to make puppet available on
command line:
[root@agent ~]# ln -s /opt/puppetlabs/bin/puppet* /usr/local/bin/ - Enable and start puppet on agent node:
[root@client ~]# systemctl start puppet.service
[root@client ~]# systemctl enable puppet.service
Certificates
- Certificate request from agent:
[root@agent ~]# puppet agent --test --ca_server=master.devops.org - On the puppet master server view the certificates:
[root@master ~]# puppet cert list - On the puppet master server sign the certificate from
agent:
[root@master ~]# puppet cert sign agent.devops.org
Deploying website on agent
- Create manifests for setting up apache server on agent:
Go to path "/etc/puppetlabs/code/environments/production/ manifests" on master node and copy file apache.pp - Create manifests for setting up git and continuous
integration on agent:
Go to path "/etc/puppetlabs/code/environments/production/ manifests" on master node and copy file site.pp - Install the puppet vcsrepo module for continuous
delivery on master node:
[root@master ~]# puppet module install puppetlabs-vcsrepo --version 2.3.0 - Configure the time interval for continuous delivery:
Edit file "/etc/puppetlabs/puppet/puppet.conf" and add below lines of code on agent node -
server = master.devops.org
runinterval = 30 - Run the catalog to setup agent node:
[root@agent ~]# puppet agent --test --ca_server=master.devops.org
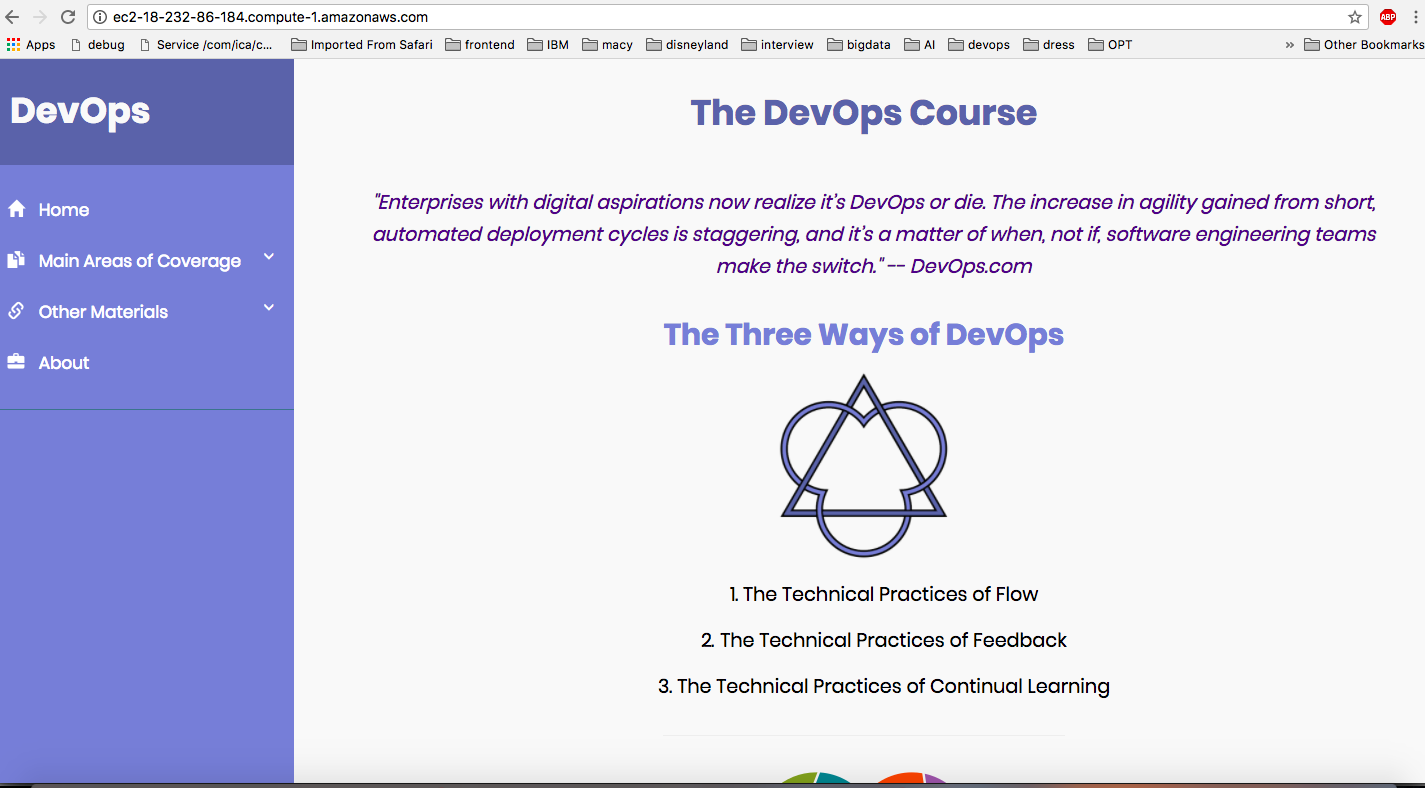
After following the above steps, the website is deployed on agent node and can be accessed by using the agent ip address or dns name. It should open the deployed website as shown -
If there are any new commits made on git the website will be continuously refreshed with the changes.
Run Deployment Automation
We have automated the above deployment steps for hosting the course website on Amazon Cloud. Steps to run:
- Download puppetScripts folder from git repository.
- Go to the folder on your local machine.
- To install the required packages and configure AWS account run the following script: ./install.sh
-
Run the following command to start the deployment on Amazon
AWS:
python deploy.py
Note: There might be additional python packages not installed on your machine. Please make sure to install them if error prompts while running the deploy script.